
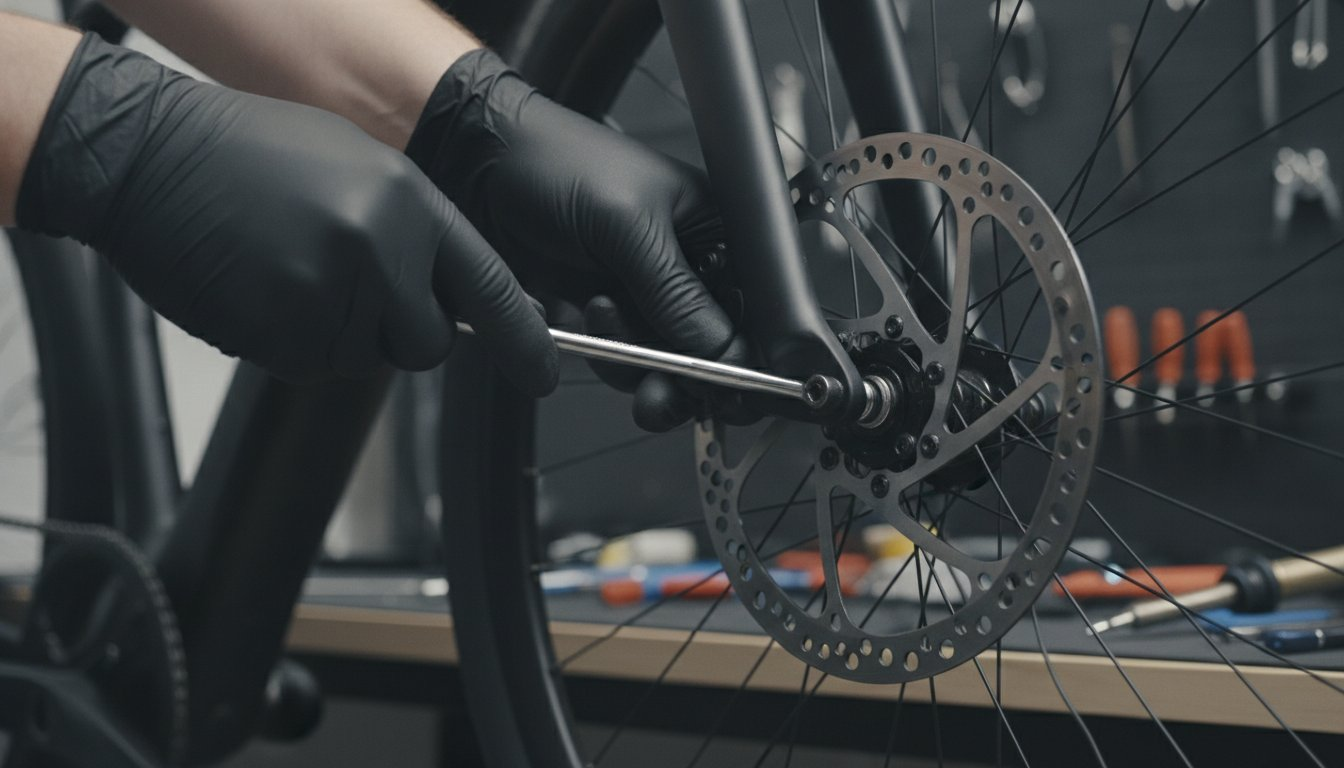
Did you know that over 60% of e-bike riders admit they underestimate their braking distance until they’re forced to make an emergency stop? It’s a jarring experience when you squeeze your levers at high speed only to have them pull all the way to the handlebar while an annoying squeal echoes through the street. Mastering electric bike brake adjustment is no longer just a hobby; it’s a critical safety skill for handling the heavier weights and higher speeds of modern 2026 models. You deserve to feel completely in control of your ride, not worried about whether your brakes will hold up during a sudden traffic stop.
We believe that a well-maintained bike is the foundation of a great riding lifestyle. This guide will help you reclaim a crisp, firm lever feel and ensure your stopping power is always predictable and silent. We’ll walk through how to diagnose those high-pitched noises, adjust for pad wear, and help you decide when a DIY fix is safe or when your system requires a professional technician. You’re about to learn the exact steps needed to keep your e-bike operating with maximum performance and total reliability on every journey.
Key Takeaways
- Identify the specific Metric Allen keys and Torx T25 wrench required to build a reliable home maintenance kit for modern e-bikes.
- Understand how the increased weight and speed of your e-bike demand significantly more braking force than a traditional bicycle.
- Master the step-by-step process for a manual electric bike brake adjustment to eliminate lever drag and restore a firm, predictable feel.
- Learn to decode high-pitched brake noises and inspect pads for “glazing” to ensure silent and effective stopping power.
- Recognize the “500-mile rule” to determine when a DIY fix is insufficient and a professional safety inspection is necessary for long-term reliability.
The Physics of Stopping: Why E-Bike Brake Maintenance is Different
Stopping an e-bike isn’t the same as slowing down a standard cruiser. The physics of momentum are unforgiving when you combine higher speeds with significantly more mass. While a traditional bicycle might weigh 25 pounds, most e-bikes sit between 50 and 80 pounds. When you’re cruising at 20mph or more, your system must dissipate roughly 40% more kinetic energy than a non-electric bike just to come to a controlled halt. This extra energy converts into heat, which places immense stress on every component of your Bicycle brake systems.
Regular electric bike brake adjustment is vital because this increased workload accelerates wear. Heavier frames put more pressure on the brake pads, causing them to thin out faster than you might expect. If you ignore this wear, the heat can eventually lead to rotor warping or “glazing,” where the pads become too smooth to grip the metal effectively. Understanding whether you have a mechanical or hydraulic system is your first step toward maintaining safety. For a broader look at keeping your entire machine in top shape, our guide on how to maintain an electric bike covers the full spectrum of mechanical and electrical upkeep you’ll need.
Mechanical vs. Hydraulic: A Quick Comparison
Mechanical disc brakes use a traditional steel cable to pull the brake caliper shut. They’re popular because they’re easier to fix if something snaps while you’re out on a trail, but they require more frequent manual tensioning as the cable stretches over time. You can identify these by the exposed silver cable near the wheel.
Hydraulic systems use sealed fluid lines to transfer force. These are essentially self-adjusting for pad wear, providing a much more consistent and powerful feel at the lever. Because of the high speeds and weight involved, hydraulic brakes dominate premium models like the Himiway Zebra. While they offer superior stopping power, they eventually require “bleeding” to remove air bubbles that make the levers feel spongy.
Thermal Management and Rotor Health
Heat is the primary enemy of e-bike performance. To handle the thermal load, e-bike rotors are typically thicker than standard ones, often ranging from 1.8mm to 2.3mm. This extra metal helps dissipate heat before it can damage your pads. If your pads look shiny or glass-like, they’ve likely “glazed” due to excessive heat, which significantly ruins your stopping distance and causes that dreaded high-pitched squeal.
Maintaining your rotors is just as important as the electric bike brake adjustment itself. If you notice a blue or rainbow tint on the metal, it’s a sign of extreme heat exposure. Brake fade is the temporary reduction in stopping power caused by heat buildup in the pads and rotors during sustained braking on long downhill descents. Keeping your system clean and properly aligned ensures you don’t experience this loss of control when you need it most.
The Essential Tool Kit for Home Brake Adjustments
A successful electric bike brake adjustment starts long before you turn a single bolt. It begins on your workbench with the right selection of tools. Because e-bikes are precision machines that handle significant force, using the wrong tool can easily strip a bolt or lead to a dangerous mechanical failure. Most modern e-bikes rely on metric hardware, so a high quality Allen key set featuring 2mm, 4mm, and 5mm sizes is your baseline requirement. You’ll use the 2mm key for fine-tuning lever reach, while the 4mm and 5mm keys handle the heavier tasks of securing calipers and mounting brackets.
Beyond standard hex keys, you must have a Torx T25 wrench. This star-shaped tool is the industry standard for disc rotor bolts. Attempting to use anything else will likely ruin the bolt head. For the actual adjustment process, keep a clean business card or a specialized rotor truing tool nearby to help set the perfect gap between the pads and the rotor. These heavier machines require specific e-bike maintenance considerations that differ from standard cycling, especially regarding the precision of your hardware.
The most important “pro” tool you can invest in is a torque wrench. E-bike components are subject to constant vibration and high thermal loads. Tightening a bolt “by feel” isn’t enough when your safety is on the line. Following the manufacturer’s exact torque specifications ensures that your calipers won’t vibrate loose during a high-speed descent.
Safety First: Preparing Your Workspace
Secure your bike in a heavy-duty e-bike stand before you start. While some riders flip their bikes upside down to work on the wheels, you should never do this if you have hydraulic brakes. Flipping the bike can allow air bubbles in the reservoir to migrate into the calipers, resulting in a spongy lever feel that requires a full system bleed to fix. Always clean the entire braking area with 90% or higher isopropyl alcohol and a lint-free rag before you begin. This prevents road grit from being pushed into the pistons during the electric bike brake adjustment process.
Just as cleanliness is vital for bike safety, it is also a priority in other professional trades; for those who value premium, high-performance equipment, check out BarberNation: Professional Barber Tools and Grooming Supplies to discover tools designed for professional-grade precision and care.
The ‘Clean Hands’ Rule
Cleanliness is the golden rule of brake maintenance. Your skin produces natural oils that can contaminate a rotor instantly. Even worse, a single stray drop of chain oil or degreaser can permanently ruin a set of brake pads by soaking into the porous material. Once pads are contaminated, they usually cannot be saved and must be replaced. Wear nitrile gloves to keep your rotors pristine and prevent skin oils from transferring to the braking surface. If you accidentally touch a rotor, stop immediately and scrub it down with isopropyl alcohol. If you’re uncomfortable handling these sensitive components yourself, our professional Brake Adjustment and Repair service can ensure your system is perfectly calibrated and contaminant-free.
Step-by-Step Guide to Adjusting Mechanical Disc Brakes
Mechanical disc brakes are reliable and easy to service, but they require more hands-on attention than hydraulic systems because they don’t self-adjust as the pads wear down. Performing a regular electric bike brake adjustment ensures that your stopping power remains consistent even as you put miles on your motor. Before you start turning bolts, spin your wheel and look through the caliper. You must check the rotor for trueness first; if the metal disc is wobbling or bent, no amount of caliper sliding will fix a persistent rub. If it’s straight, you’re ready to begin the alignment process.
Start by loosening the two main caliper mounting bolts just enough so the caliper can “float” or wiggle side-to-side. This allows the system to find its own center. Use the “Squeeze and Tighten” method: pull the brake lever firmly against the handlebar and hold it there. While the pads are clamped onto the rotor, tighten the mounting bolts back down in an alternating pattern. This trick uses the rotor itself as a centering jig. Once tight, release the lever and check for daylight between the pads and the disc. You are aiming for a precise 0.3mm gap on both sides to ensure the pads don’t drag while you’re pedaling.
Fine-tuning the inboard and outboard pads is the final technical step. Most mechanical calipers have a stationary inboard pad that you can move closer to the rotor using a 5mm hex key. Adjust this pad until it’s as close as possible without touching. Finally, use the barrel adjuster located at the brake lever to take up any remaining slack in the cable. This gives you that crisp, predictable “pull” feel that makes high-speed riding much safer.
Centering the Caliper for Zero Rub
Visualizing the “daylight” between the pad and the rotor is the best way to confirm a perfect alignment. If you’re struggling to see the gap, slide a clean business card between the inboard pad and the rotor while tightening the bolts. This creates a perfect, even spacer that prevents the pad from rubbing. If the rub persists after these steps, your rotor is likely slightly warped and may need a specialized truing tool to gently bend it back into a perfectly flat plane.
Cable Tension and Barrel Adjusters
The barrel adjuster is your best friend for quick, on-the-go electric bike brake adjustment. Turning it outward increases tension, which brings the pads closer to the rotor. However, if you find yourself unscrewing the barrel adjuster more than halfway, it’s time to screw it back in and reclamp the cable at the caliper arm instead. Cable stretch typically occurs during the first 100 miles of riding a new e-bike as the steel strands settle into their housing and ferrules. Always ensure the cable housing is seated deeply in the lever and caliper stops; a loose housing can cause a sudden, terrifying loss of braking power when you squeeze the lever hard. When you remove a wheel for e-bike tire replacement on hub motor models, always recheck your cable tension and caliper alignment before your first ride, as repositioning the axle can subtly shift the rotor’s position relative to the pads.

Silencing the Squeal: Troubleshooting Common E-Bike Brake Issues
Your e-bike is talking to you. Every chirp, scrape, or howl is a specific diagnostic signal that tells you exactly what’s happening between your pads and rotors. While a standard electric bike brake adjustment solves most alignment issues, noise often points to surface conditions or heat damage. Identifying the difference between a harmless vibration and a critical failure is the first step toward a silent, safe ride.
Heat is the primary cause of many acoustic issues. Because e-bikes carry more momentum, the braking system gets much hotter than a traditional bicycle. If you notice your pads have a shiny, glass-like surface, they’ve “glazed” due to excessive heat. This glazing significantly reduces friction, forcing you to pull the levers harder and increasing your stopping distance. If your levers feel spongy despite a fresh adjustment, air bubbles have likely entered your hydraulic lines, which requires a system bleed rather than a simple cable tightening.
Brake Noise Diagnostic Table
Use this table to translate what you’re hearing into an actionable fix. Most minor bends can be corrected with a rotor truing fork, saving you the cost of a replacement part.
| Sound | Likely Cause | Fix |
|---|---|---|
| Chirp or Scrape | Bent or warped rotor | True the rotor with a truing fork |
| High-Pitched Howl | Contamination (oil/grease) | Clean rotors; replace pads |
| Deep Metallic Grind | Worn pads (metal on metal) | Immediate pad replacement |
If these noises persist after a careful electric bike brake adjustment, it’s time to bring in the experts for a Brake Adjustment and Repair to ensure your safety and restore your bike’s performance.
The Pro Bedding-In Procedure
Every time you install new pads or rotors, you must “bed them in” before your first real ride. This process creates a microscopic transfer layer of pad material on the rotor surface, which is essential for maximum friction. Skipping this step often leads to permanent squealing and uneven wear on your Himiway or Mokwheel brake components. Never perform a full-stop skid during your first 20 stops, as this can create “hot spots” on the rotor that cause pulsing later on.
Follow the “10-10-10” Rule for a perfect finish:
- Perform 10 moderate stops from 15 mph down to 5 mph.
- Release the brakes before you reach a complete standstill to avoid uneven material transfer.
- Repeat this for the front and rear brakes separately to build heat gradually.
Proper bedding-in increases the lifespan of your components and ensures that your brakes operate silently. It turns a raw piece of metal into a high-performance safety system that you can trust during an emergency stop.
Ensuring Long-Term Safety: Professional Inspections and Upgrades
Taking pride in your own maintenance is a hallmark of a dedicated rider. While a routine electric bike brake adjustment keeps your daily commute smooth, e-bikes are high-stress machines that eventually require a deeper look. We recommend following the 500-mile rule. Every 500 miles, your bike should undergo a professional safety inspection to check for structural fatigue and hydraulic integrity that home tools might miss. This proactive approach ensures that minor wear doesn’t turn into a high-speed mechanical failure during your next journey. To build the complete maintenance mindset that goes beyond brakes alone, the complete 2026 owner’s manual on how to maintain an electric bike provides the full monthly checklist and service schedules every e-bike owner needs.
If you find yourself frequently hauling heavy cargo or navigating long, steep descents, consider upgrading your stopping hardware to match your riding style. Many standard e-bikes come with 180mm rotors, but moving to 203mm rotors provides a much larger surface area for heat dissipation. This upgrade increases your mechanical leverage and significantly reduces the risk of brake fade when the system gets hot. At Tartarian E-bikes, we prioritize your safety by offering multi-point inspections that examine every bolt, seal, and friction surface to guarantee your bike performs exactly as the engineers intended.
When to Stop DIY and Call a Pro
Safety is about knowing your limits. There are specific red flags that indicate a DIY electric bike brake adjustment is no longer enough to keep you safe. If you see an oily residue on your calipers or brake levers, you likely have a leaking hydraulic seal. This is a critical failure that requires professional repair to prevent total braking loss. You should also inspect your pads regularly; if they are worn thinner than a dime, which is approximately 0.9mm, they’ve reached the point of no return. Finally, run a fingernail across your rotor. If you feel deep scoring or a prominent “lip” at the edge of the metal, the rotor is too thin to safely dissipate heat and must be replaced immediately.
The Value of Professional E-Bike Assembly
Safety begins at the very first bolt. Professional assembly is the foundation of a reliable braking system, as it prevents “out of the box” issues like misrouted hydraulic lines, loose rotors, or poorly seated cables. A professional technician uses a standardized safety inspection checklist to ensure every component is seated and synchronized perfectly. This expert oversight eliminates the guesswork and gives you the confidence to push your bike to its limits. Ready for a safer ride? Book a Professional Safety Inspection at Tartarian E-bikes to ensure your machine is in peak condition.
Master Your Stopping Power for the Road Ahead
Maintaining your braking system is the single most important habit you can develop as an e-bike owner. You’ve learned how the increased weight and speed of modern machines demand more frequent electric bike brake adjustment to prevent glazing and ensure a firm, predictable lever feel. By mastering the “squeeze and tighten” method and following a proper bedding-in procedure, you can eliminate annoying squeals and ride with the confidence that your bike will stop exactly when you need it to.
However, DIY care is only one part of the safety equation. As an authorized dealer for Himiway, Mokwheel, and Denago, our team uses specialized tools specifically designed for heavy-duty e-mobility devices. We provide expert multi-point safety inspections that go beyond the surface to ensure every seal and bolt meets professional standards. Don’t leave your safety to chance when you’re cruising at high speeds. Schedule a Professional Brake Tune-Up Today and enjoy the peace of mind that comes with expert service. Your next adventure is waiting, and we’re here to make sure you’re ready for every stop along the way.
Frequently Asked Questions
How often should I adjust my electric bike brakes?
You should perform an electric bike brake adjustment every 200 to 500 miles depending on your riding conditions and the weight of your bike. Heavier e-bikes used for cargo or hilly commutes put more stress on the pads, requiring more frequent check-ups. If you notice the lever feels loose or the stopping distance has increased, it’s time for a quick tune-up regardless of the mileage.
Why do my e-bike brakes squeak even when they are new?
New e-bike brakes often squeak because they haven’t been properly “bedded in” to create a transfer layer of material on the rotor. This process is essential for silent operation and maximum friction. If you’ve already bedded them in and the noise persists, the rotors or pads might have been contaminated with oil or grease during assembly or shipping.
Can I use WD-40 to stop my brakes from squeaking?
What is the difference between resin and metallic brake pads for e-bikes?
Resin pads offer a quieter ride and better initial “bite,” but they wear down quickly under the high heat and weight of an e-bike. Metallic pads are the preferred choice for heavy-duty e-mobility because they handle extreme temperatures better and last longer. While metallic pads can be noisier in wet conditions, their durability is vital for high-speed safety.
How do I know if my hydraulic e-bike brakes need to be bled?
Your hydraulic brakes need to be bled if the lever feels “spongy” or if you have to pump it multiple times to get a firm response. This happens when air bubbles get trapped inside the sealed fluid lines, compressing under pressure and stealing your stopping power. A professional bleed removes this air and replaces old fluid to restore a crisp, reliable feel.
Is it safe to ride my e-bike if the brake lever touches the handlebar?
It is not safe to ride if your brake lever pulls all the way to the handlebar. This indicates a total loss of mechanical or hydraulic leverage, meaning you won’t be able to apply enough force to stop in an emergency. If a manual electric bike brake adjustment doesn’t fix the gap, your bike requires immediate professional service to address worn pads or fluid issues.
How long do e-bike brake pads typically last?
E-bike brake pads typically last between 500 and 1,500 miles, though this varies significantly based on terrain and rider weight. Because e-bikes travel at higher average speeds and weigh much more than standard bicycles, they consume friction material much faster. You should inspect your pad thickness every month to ensure you have at least 1mm of material remaining.
Can I upgrade my mechanical brakes to hydraulic ones?
You can upgrade most mechanical systems to hydraulic ones, provided your frame and fork have standard disc brake mounts. This is a common and highly recommended upgrade for riders looking for better modulation and reduced hand fatigue. You must ensure the new levers are compatible with your e-bike’s motor cutoff sensors to maintain all integrated safety features. If you’re planning a full wheel service alongside this upgrade, our complete 2026 e-bike tire replacement and maintenance guide walks you through safely disconnecting hub motor wiring and re-aligning your wheel to protect both your new brakes and your electrical system.